Integrating Zapier and Procuret
Procuret can send Zapier a data package every time you make a sale.
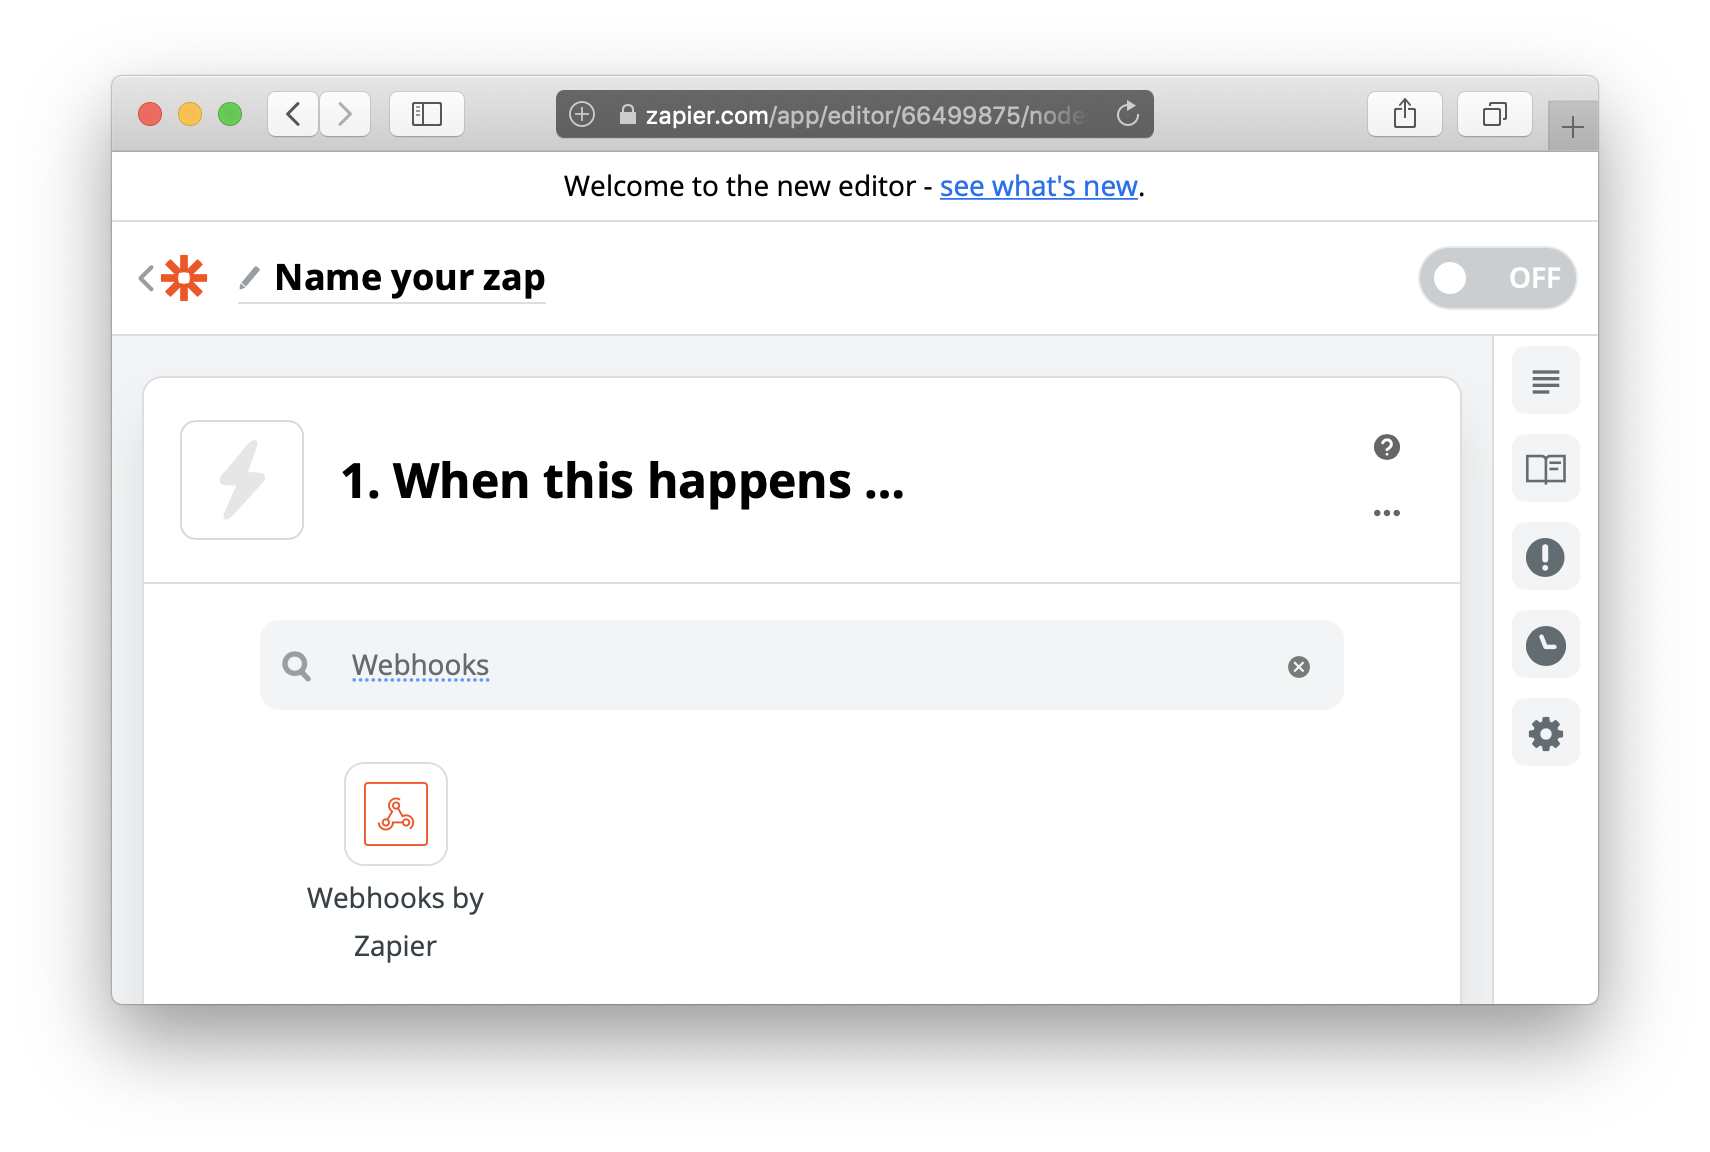
1. Creating a Zapier Webhook URL
In Zapier, create a new Zap, and choose Webhook as the data source.
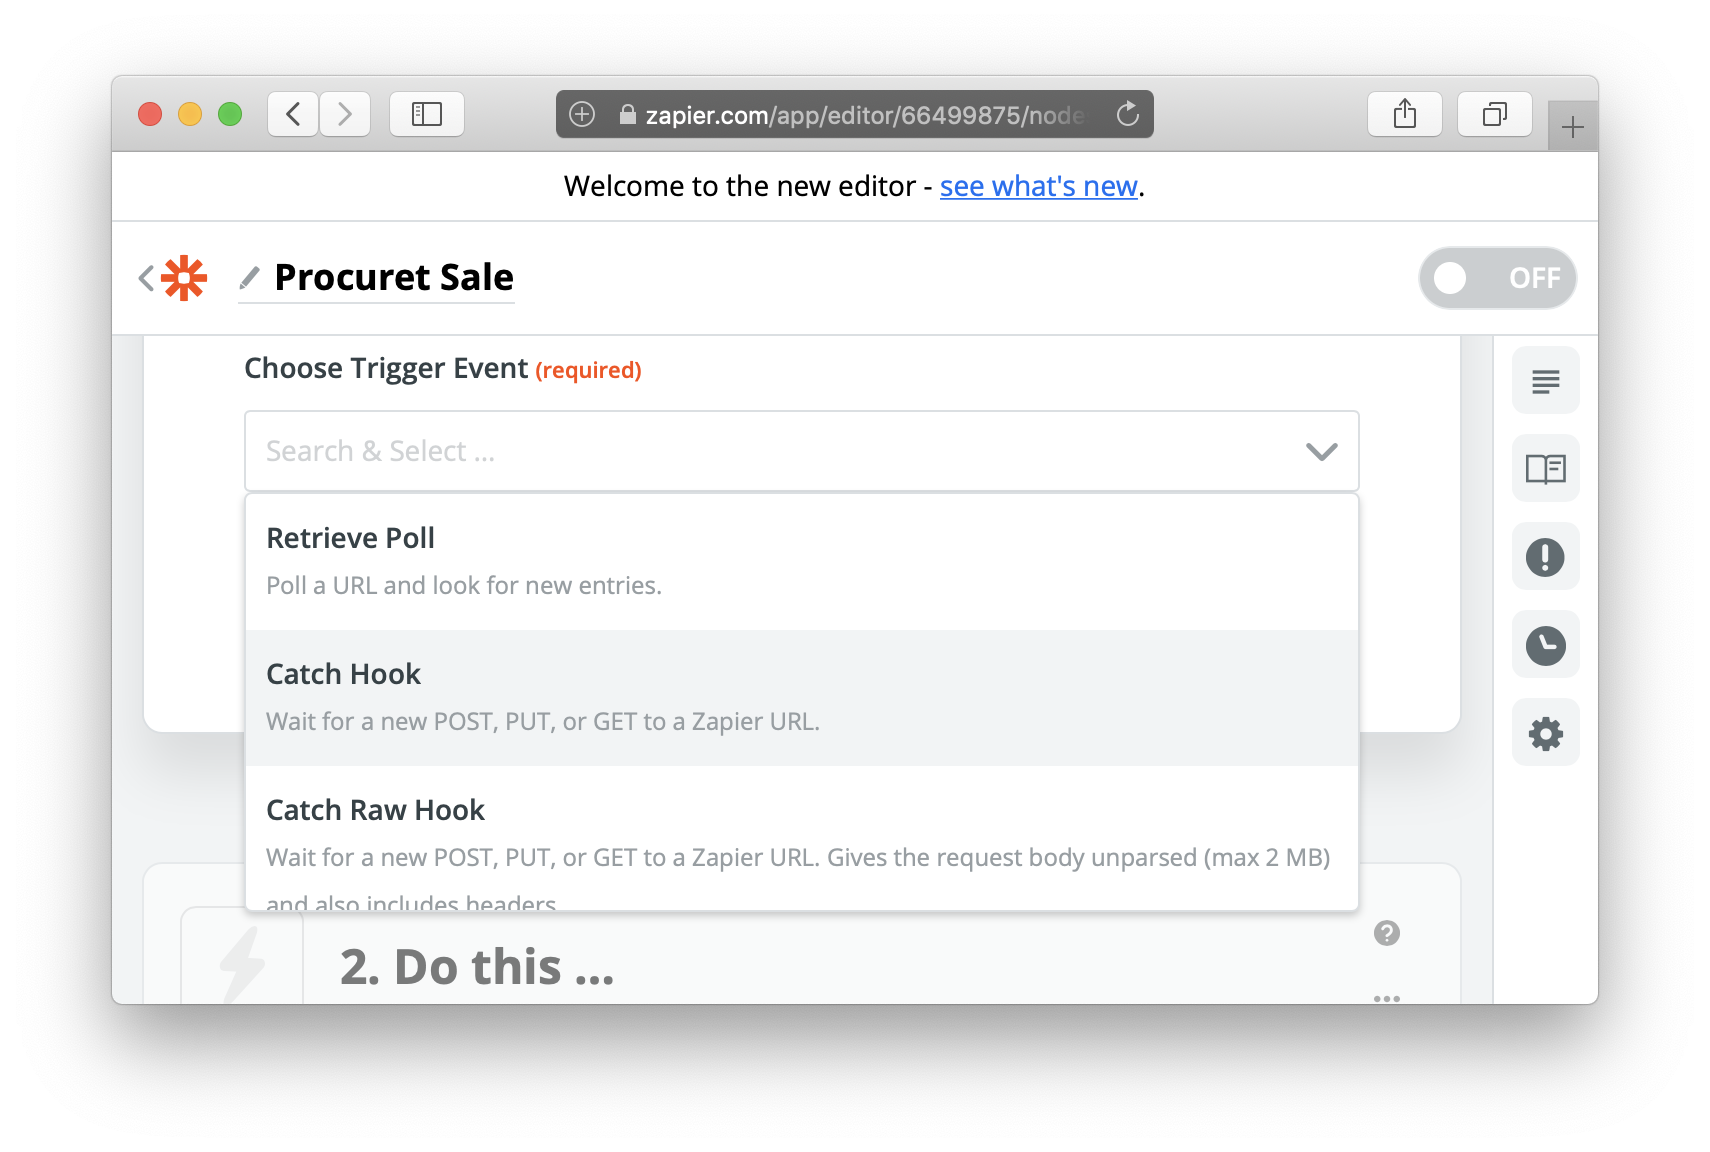
Choose the trigger event Catch Hook, hit Continue.
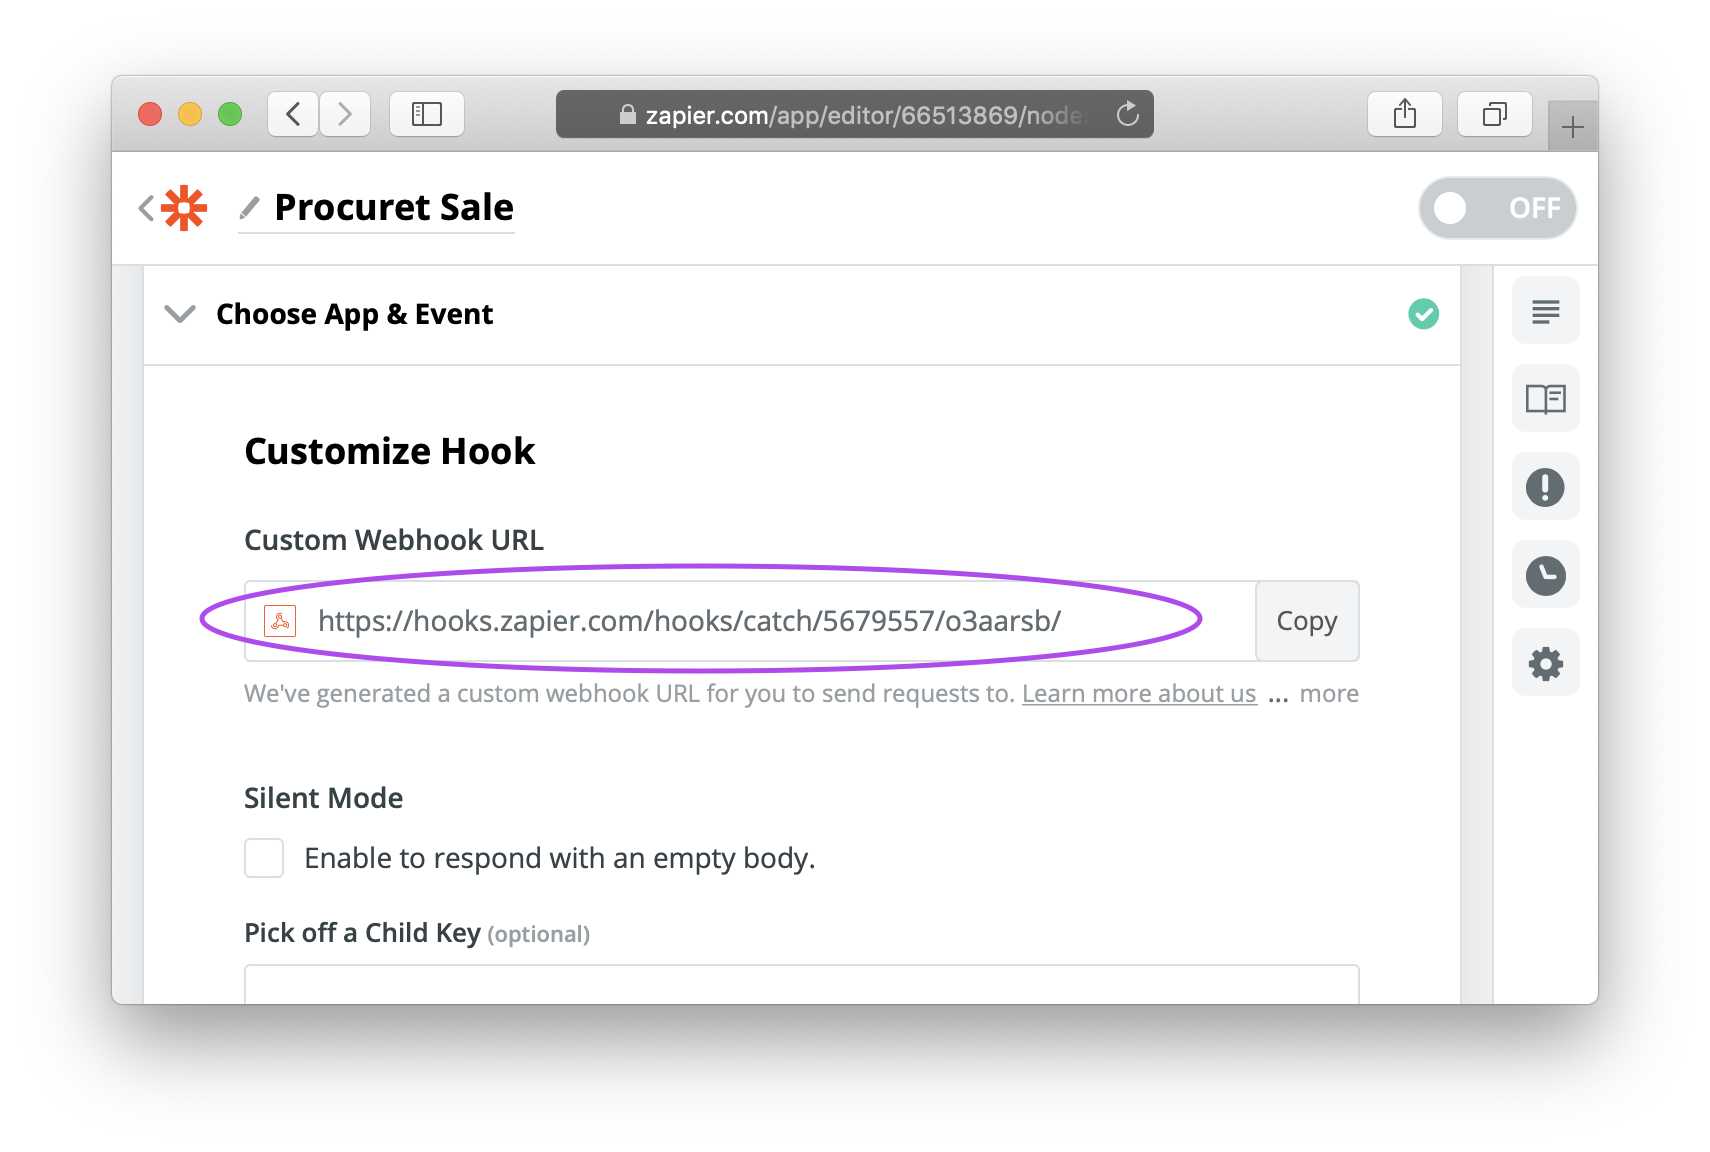
Zapier will now offer you a Custom Webhook URL. Keep this Zapier window open, we'll come back to it in a moment.
Telling Procuret to send data to Zapier
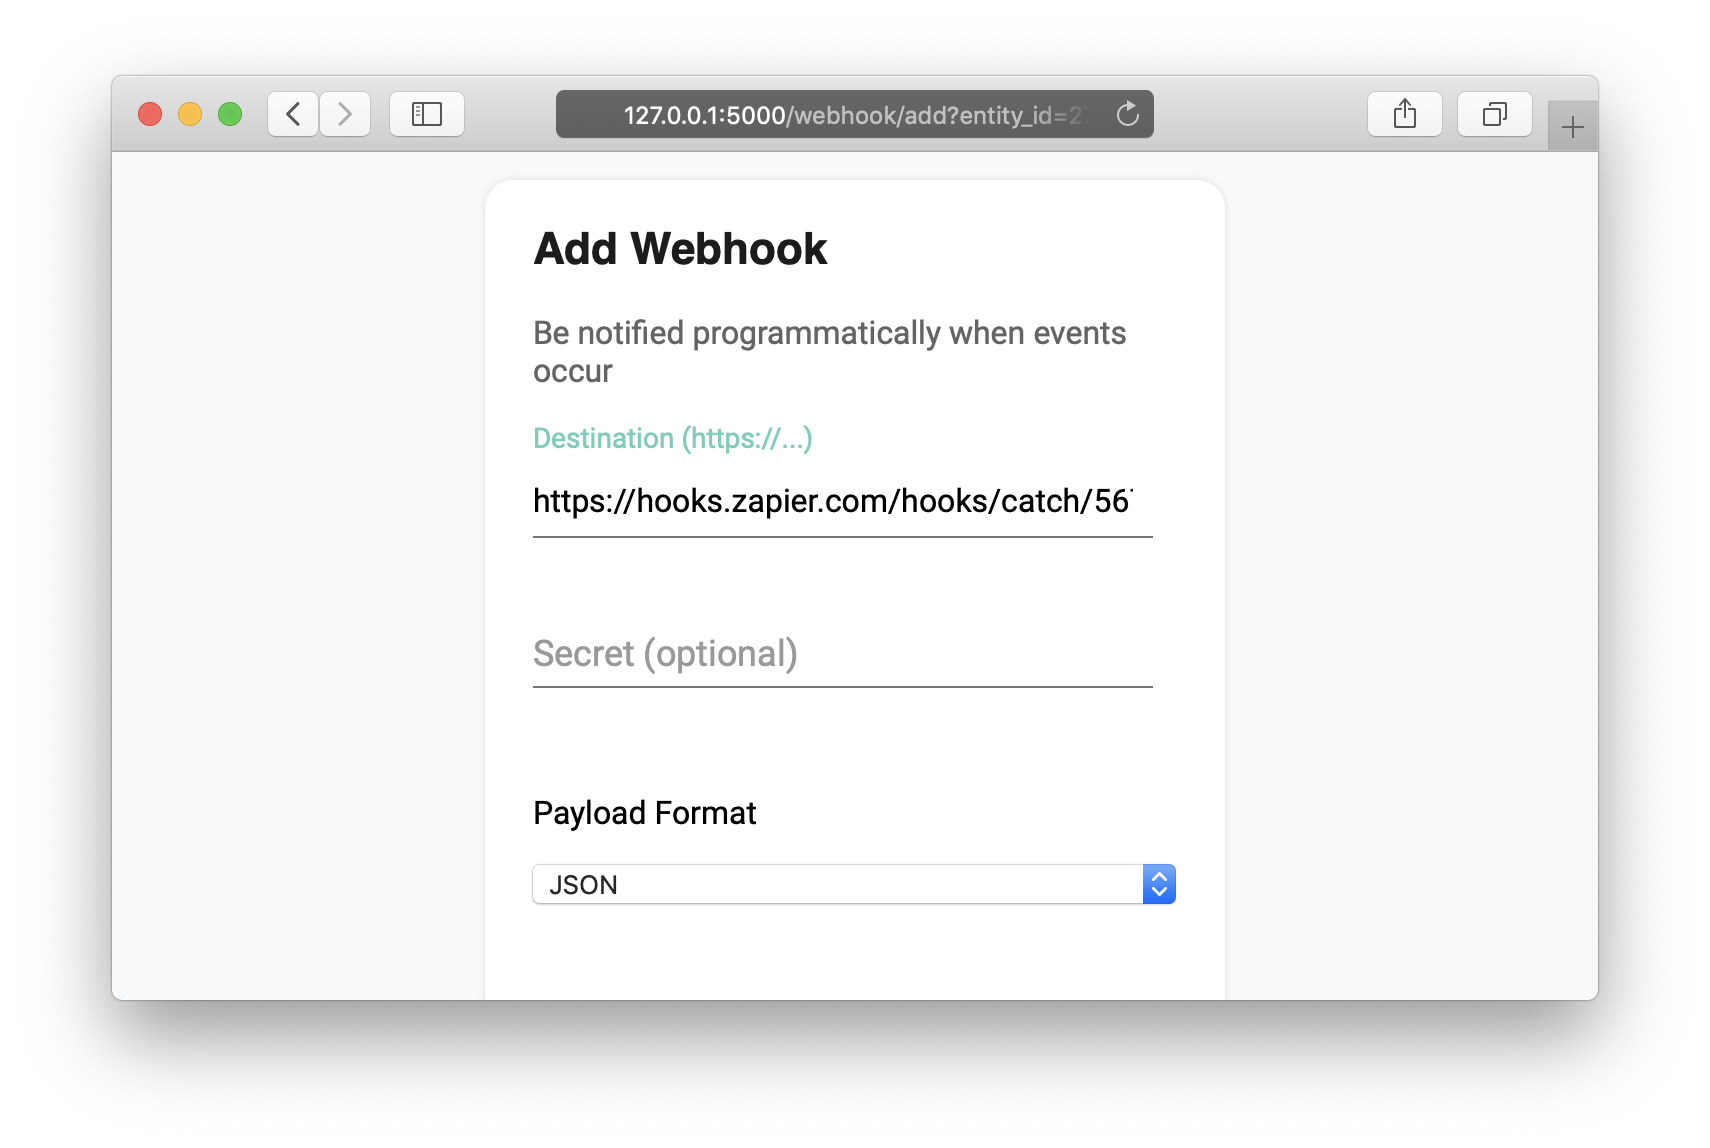
Access your Procuret webhook interface and select
Create Webhook. Copy the Zapier URL step 1 into the Destination
field.
Leave Secret blank. Ensure that the `JSON` payload type is selected, and
ensure that the Commitment event is selected. Finally, hit
Create Webhook.
Our new webhook is ready to roll. Zapier needs to see example data in order to offer up fields to you. To create one, open the actions menu on your newly minted Webhook, and choose Send Test Payload.
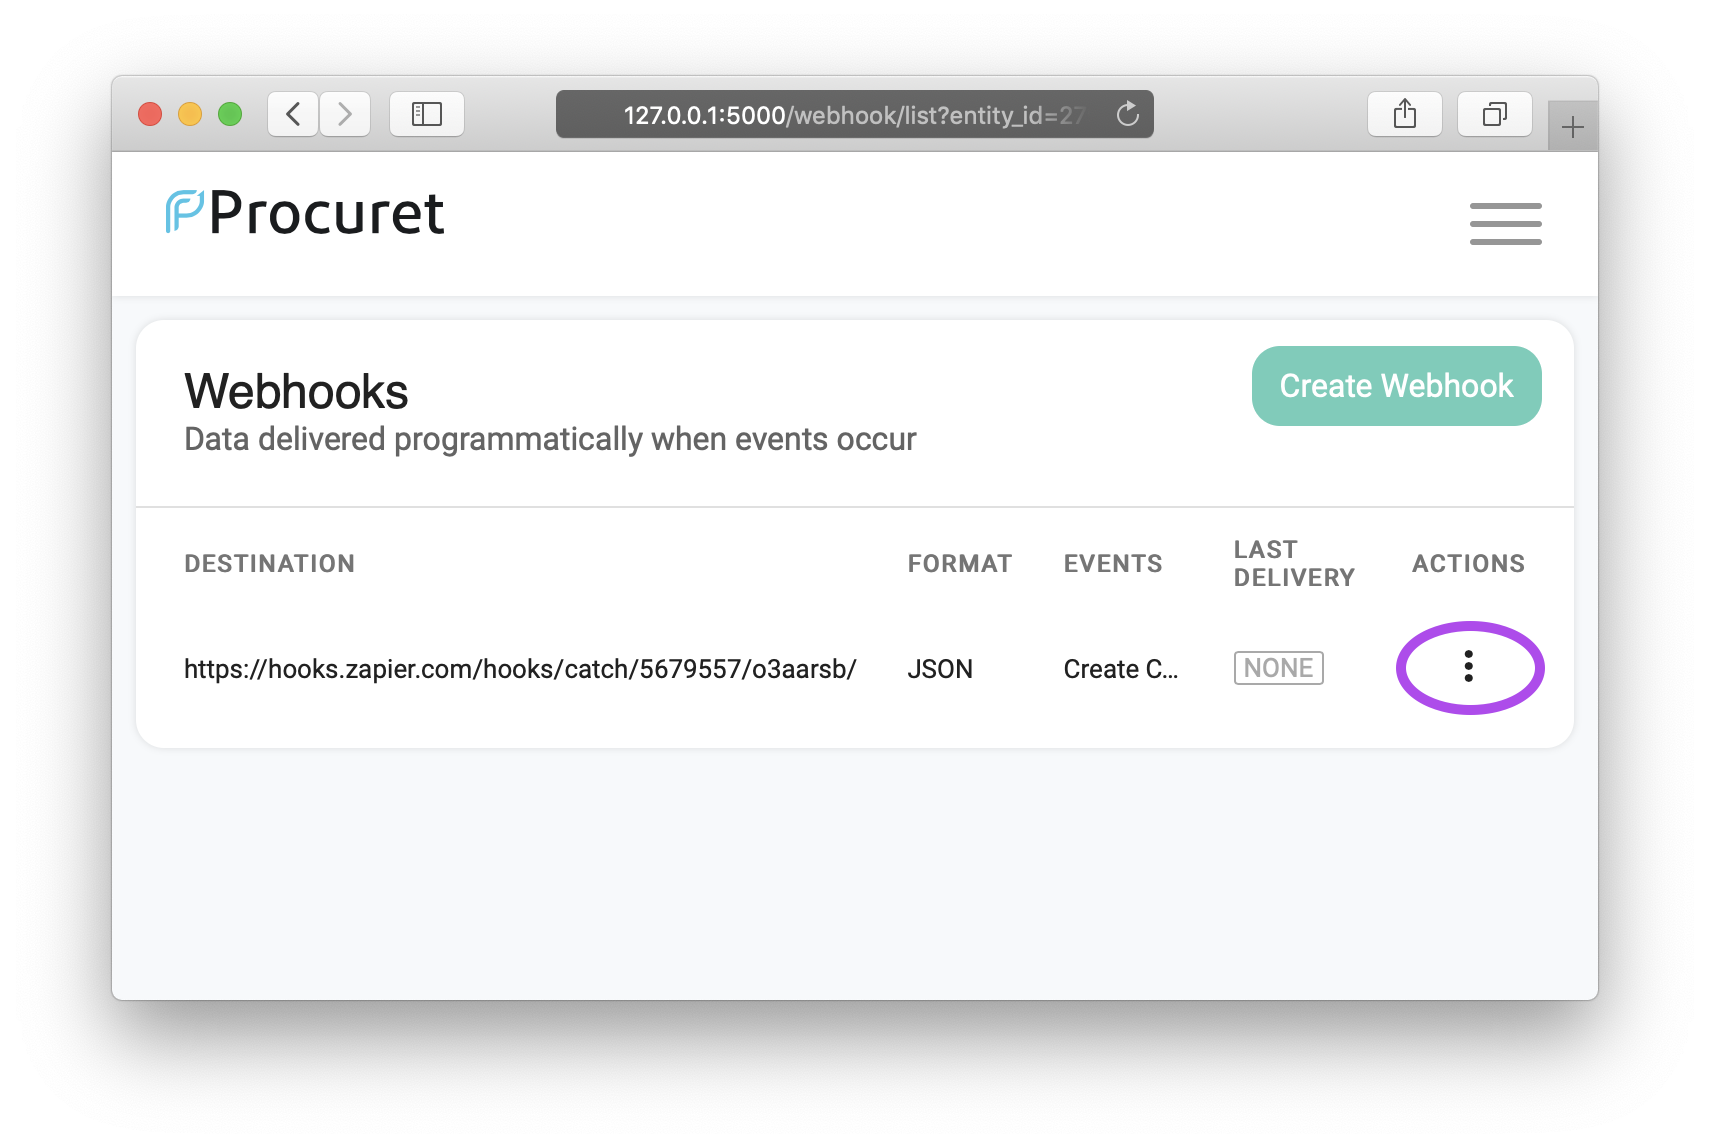
After a few seconds, your payload will arrive at Zapier. You can verify the delivery by selecting View Deliveries from the webhook actions menu. A `200` response code means everything is working. If you see another code, contact us at support@procuret.com
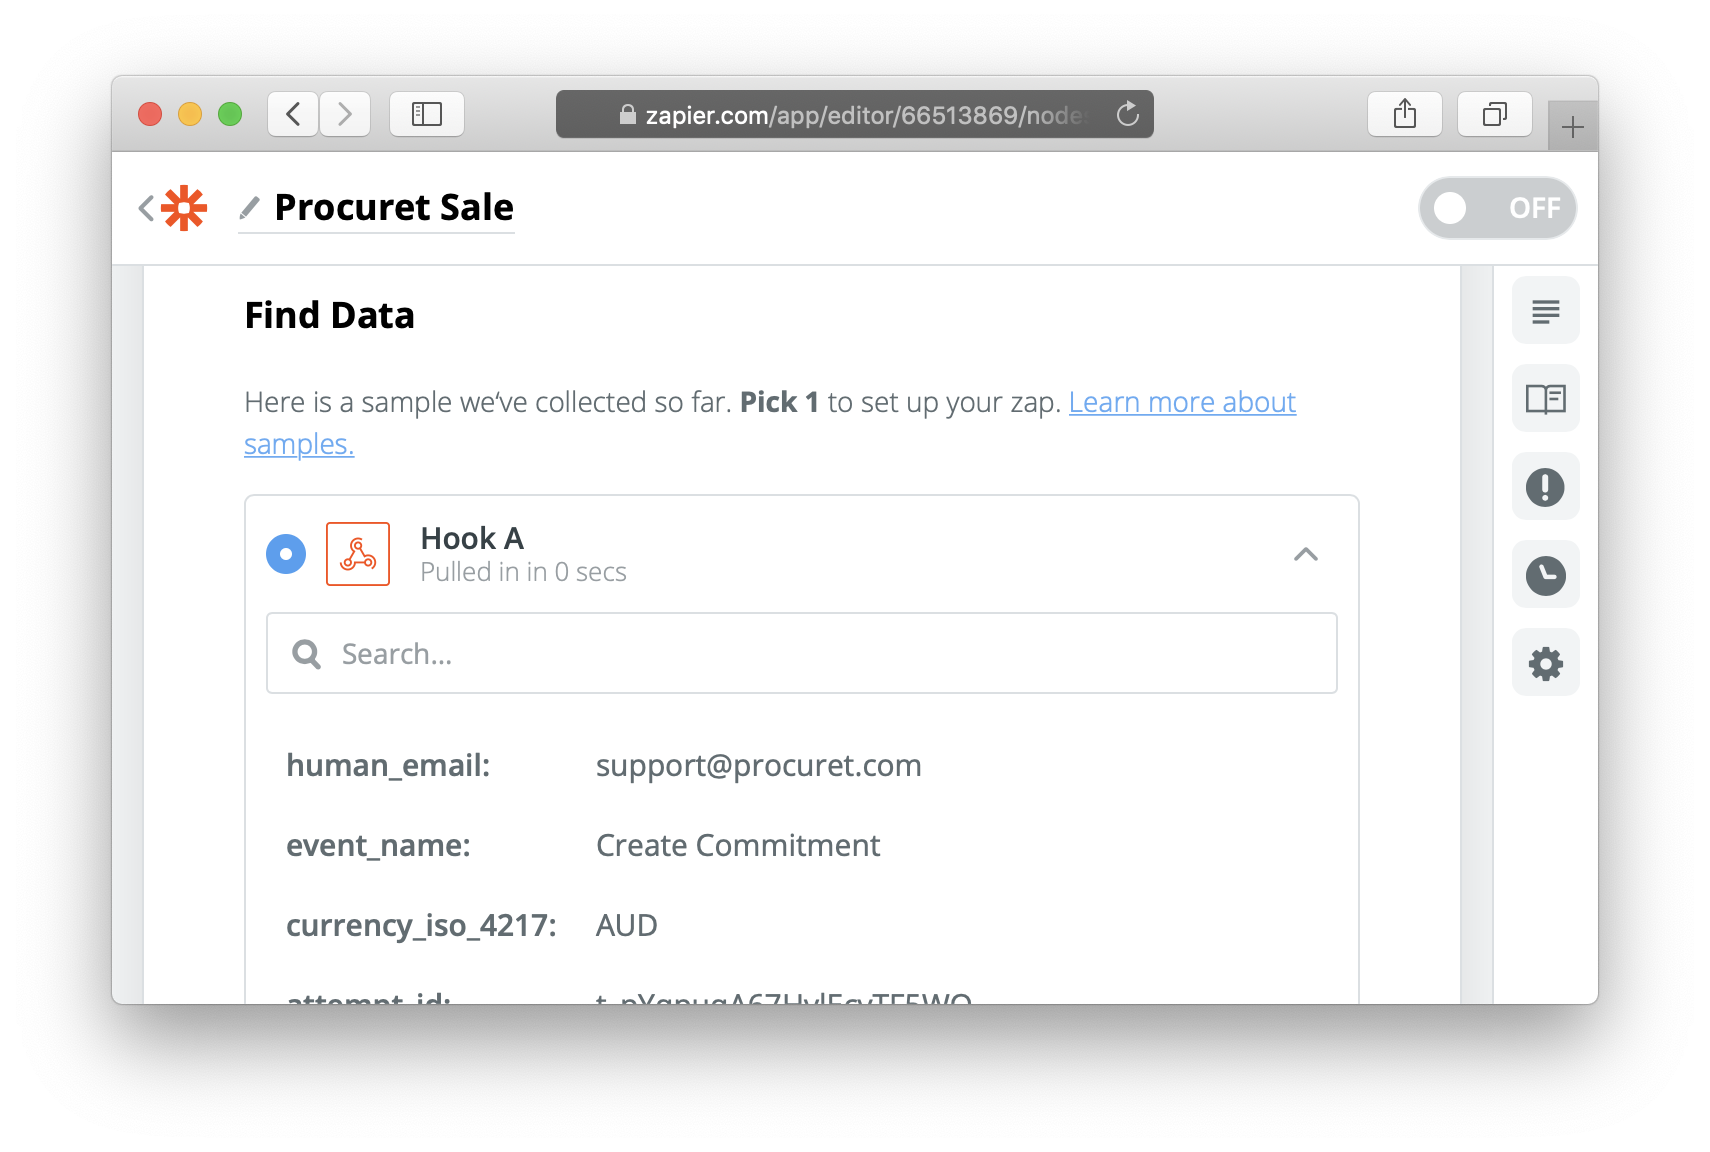
Configuring fields in Zapier
Back in the Zapier editor, hit Continue and then Test & Review. The test payload we just sent will be listed as Hook A. Inside, you will find example key/value pairs. Choose Done Editing.
Now it's time to do what you want with the webhook data. As an example, we will set up a Slack message. We will post a message to a Slack chatroom each time a sale is made.
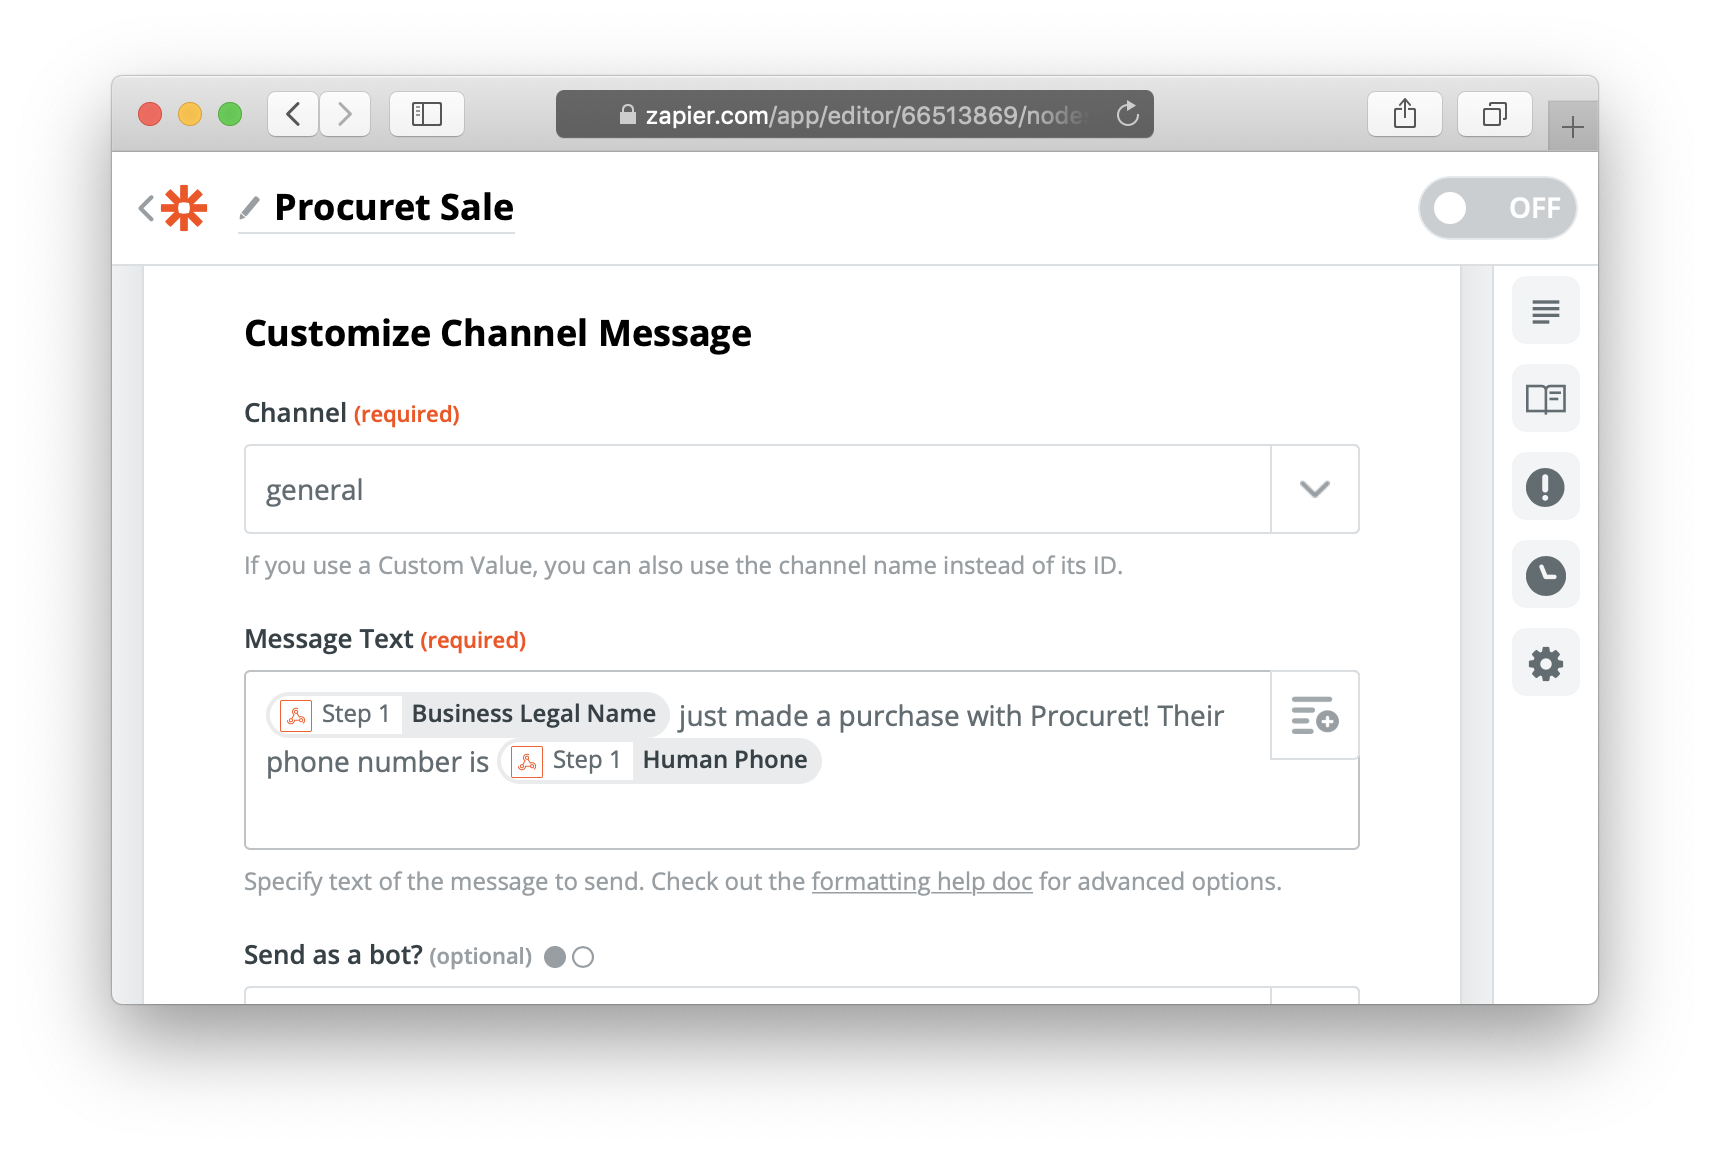
You can mix and match the webhook data fields fields as you desire. In this case, we've pulled the purchasing business name, and contact person's phone number, to form the body of our Slack message.
And that's it! If you ever need help, contact us at support@procuret.com.
